I will not be participating in any of the MonCon West events but I, as well as many of the San Diego players, will be at SoCal Smackdown to enjoy all the gaming that will be going on, including Monsterpocalypse.
A few players in the southern California area have expressed interest in getting some casual games in that are outside of the MonCon West sub-convention at SoCal Smackdown. This interest has now spawned a separate Monsterpocalypse "casual" tournament at SoCal Smackdown. It is a free event and will feature some interesting construction mechanics that many will find fun and challenging.
Sign-ups begin on Sunday, September 4th, at 2:30pm. First round pairings will begin between 3:00-3:30pm.
You are also welcome to register online at www.socalsmackdown.com
FYI, this event does take place at the same time as MonCon West's double monster tournament. I wish this wasn't the case but sadly it was beyond my and the TO's control.
This event will be a standard single monster tournament, 5 minute timed turns with three 2-minute extensions per match, 1 hour + random minute rounds, and a bit of a twist. Each entrant will need to submit their monster, unit, city, and map list with a sideboard. Sideboards consist of up to 5 units, 2 buildings, and 1 alternative hyper form.
Here is an example of a list w/ sideboard:
Monster:
Alpha Zor-Magna
Quantum Zor-Magna
Units:
Interceptor
Shadowgate
Elite C-Type Shinobi
Grunt KatanaGrunt Katana
Elite Katana
Sun Drone Mecha Task Master
Elite Robo Squix
Glass Robo SquixGrunt Mecha Chomper
Elite Mecha Chomper
S-1 Robo Brontox
Grunt PteradactixGlass Airborne Ape
City:
Skyscraper
Skyscraper
Skyscraper
Statue of Liberty
Sun Industries
Sun Industries
Sun Industries
Electrical Power Plant
Defense Contractor
Insurance Company
Tokyo City Center
The Tokyo Triumph
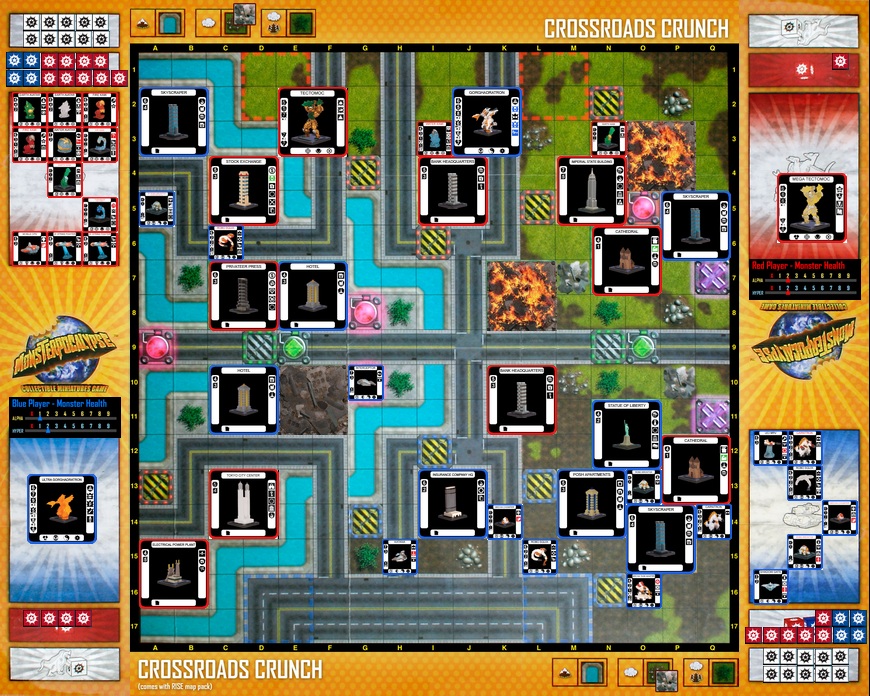
Map:
Downtown Beatdown/Boardwalk Brawl
- Sideboard:
Ultra Zor-Magna
Units:
Interceptor
Shadowgate
Grunt Robo Squix
Nautilus Blaster
Grunt Fire Kami
City:
Stock Exchange
Imperial State Building
How does a sideboard work?
After map selection, players will have 5 minutes to make modifications to their force from their sideboard by straight substitution. Forces and cities will still need to follow standard construction rules, IE no more than 5 of one unit, no more than 5 elites, 15 units and 12 buildings max. Once all substitutions have been completed, each player will reveal their modified force and begin building placement.
This sideboard method allows players a greater control over dealing with opposing monsters and forces that might be considered a "bad match-up".
For instance, let's say the player using the Zor-Magna list above is paired against the cloaky Mantacon. Quantum Zor-Magna may not be the best choice to use since she deals most of her damage with direct blast attacks. So the Zor-Magna player can use Ultra Zor-Magna instead and make use of her swat-friendly Following Fire with Fling to even the odds a bit.
Or...
The map chosen is Killer Canals. Well Underground Network buildings have little use on a map with so many Teleporters so the Zor-Magna player can switch out a couple Skyscrapers for the Imperial State and Stock Exchange.
Or...
A player just wants to change things up and try something different. Go for it and have fun!
I believe this sideboard format of play will be highly enjoyable and provide a new depth to Monsterpocalypse.
Now this is a "casual" tournament. I quote "casual" because though it is meant to just relax, have fun and make a few jokes, there will be a prize awarded to the first place player that may be highly sought after.
I'm not going to make you wait to find out what that prize is so I'll just show you now. The player who gets first place will have first choice at one of these exclusive, unofficial, Monsterpocalypse candles. Only one will be awarded but the first place player gets to chose from any of these three:
 |
| Meat Slave |
 |
| Sun Drone |
 |
| Water Avatar |
These are hand crafted, extremely unique candles created from a patented cutting and dipping process that uses multiple layers of colored wax and glaze, creating the Monsterpocalypse designs you see.
These are working candles and have a unique glow to them when lit.
If you have any questions or comments about the event, please comment below. I look forward to seeing you all at SoCal Smackdown!
May all your power ups succeed and all your strikes be super!
Good Luck!